Starlink in Action
Off Grid CTO – Starlink in Action
Exciting news up here at the off grid cabin location, we now have actual real high speed internet! In this post, I am going to look at perhaps one of the best improvements to the working conditions we have made up here in a long time. While working as the CTO of ModelOp, a great company providing enterprise solutions for model management, we have managed to make it work on traditional geo stationary satellite internet service. It has been challenging to stay in the data limits and I had a whole post on just all of those tips and tricks to make it work.
With Starlink service, however, data caps are gone, we have a true high speed connection, and it even uses less power than the Viasat installation did. So in this post we will continue from where we left off last time converting Starlink to use DC power only, and proceed on to hitching it all up to my network and seeing the end results.

Mounting the Dish
The first task was to mount the dish unit itself. I previously had an inexpensive satellite TV service, Orby, that unfortunately went out of business. I still had the mount for that dish, so I decided to repurpose it for use to hold the Starlink dish. Starlink sells a pipe adapter (way overpriced in my opinion) that makes it easy to attach the dish to any kind of pipe, including a satellite TV mount. So I simply attached the adapter to the dish mount, and then Dishy, as they call the Starlink terminal, snaps into that adapter directly. All in all that part probably only took about 15 minutes to get in place. I did a quick test by plugging it in in place, and fired it up. Within 10 minutes, it was fully up, connected to my laptop, and I had high speed internet. Amazing! I logged 150mb on my first go at it with a direct connection to the laptop, the fastest internet this part of the land has ever seen for sure. But now I wanted the rest of the install and tie it into my proper network. So more work to be done….
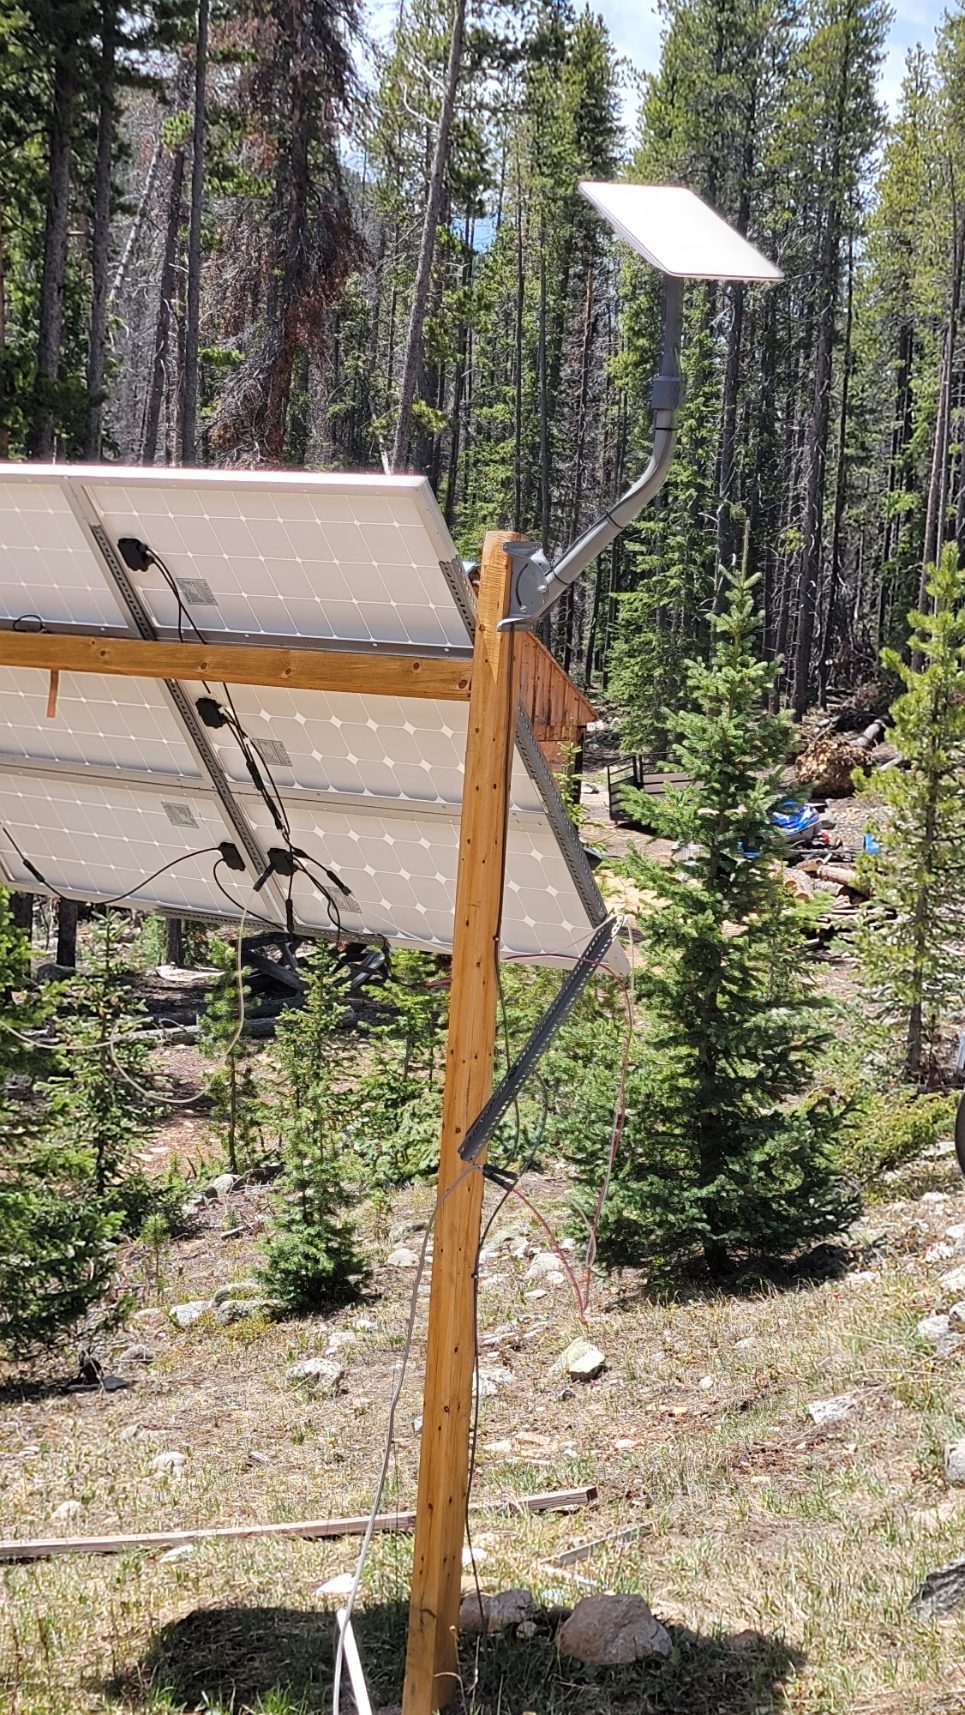
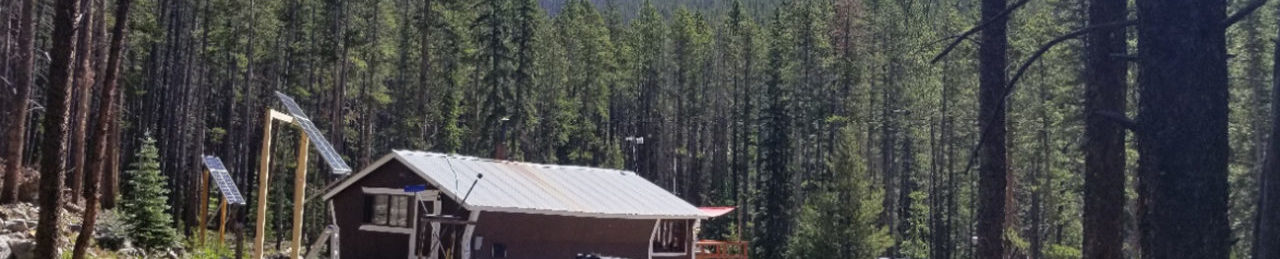
Dishy mounted to my solar panel array
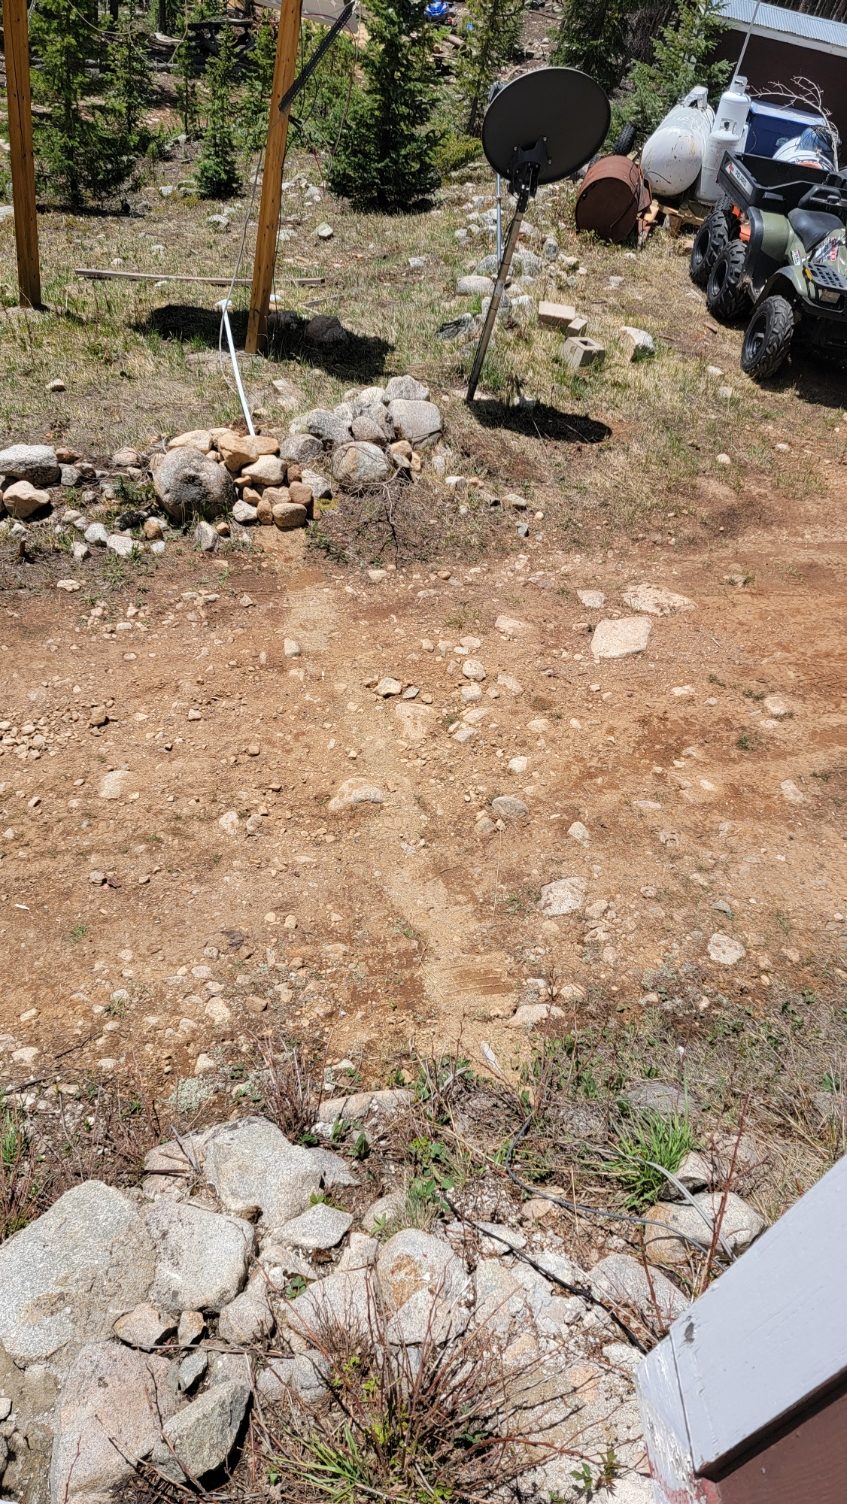
Buried underneath the driveway inside of conduit
Running the Cables
Perhaps the biggest challenge is running the cable from inside out to the dish. First of all, it uses a proprietary and large connector on the cable. So even though I had a hole already for a previous coax run, I had to enlarge it significantly to get the end through the wall. Additionally it is good to note that the end attached to the dish is the small end, so you must start inside and work your way to the dish, not the other way around.
Another challenge is that they cable they provide is not direct burial cable. Given the cable is proprietary, you don’t have a choice to substitute it out, so I had to run the cable inside of standard electrical conduit and bury that. Burying was the only option due to having to cross my driveway. So the longest part of this install was digging the trench by hand to bury the cable in. Fortunately the soil was still soft from the recently melted snow, so I made fairly short work of it.
I then ran the cable up the pole, with a drip loop, and plugged it into the dish. We now had a full install from the house out to the dish and just needed to get it into the existing network.
Hitching Up the Network
So my whole goal here is to get this tied into my existing access points, router, etc as I did not want to utilize the Starlink router. It was AC powered only (see my previous post) and has almost no configurability. Further, I have both indoor and outdoor access points, and want to have things like a guest network for when people visit. None of this was possible with the Starlink router. Fortunately I figured out how to switch it to DC and talk directly to the dish in the last post, so now it was just hard wiring it all up.
First, I added a 24v->48v buck converter next to the existing one I was using for Viasat. This then plugs into the POE injector with the special patch cable, and the modified Starlink ethernet adapter to provide power to the dish. And then I plug from the patch cable directly into one of the WAN ports on my standalone TP link router. This router allows for multiple WAN connections, so I can still keep my Viasat as a backup. Plugged it in, powered it up, and my WAN port got an IP address and everything was up and running! I had internet in my whole network from Starlink.
One hitch, though, was that the Starlink app and web page for configuring the unit would not work. The trick to get that to work was to add a static route on my WAN port to go to 192.168.100.1 which is the admin address for the dishy. So once that was in place, the app was working just fine.
I would say that this was no more difficult than any other standard kind of installation. I didn’t really have to do much and it all just worked in a pretty standard manner.
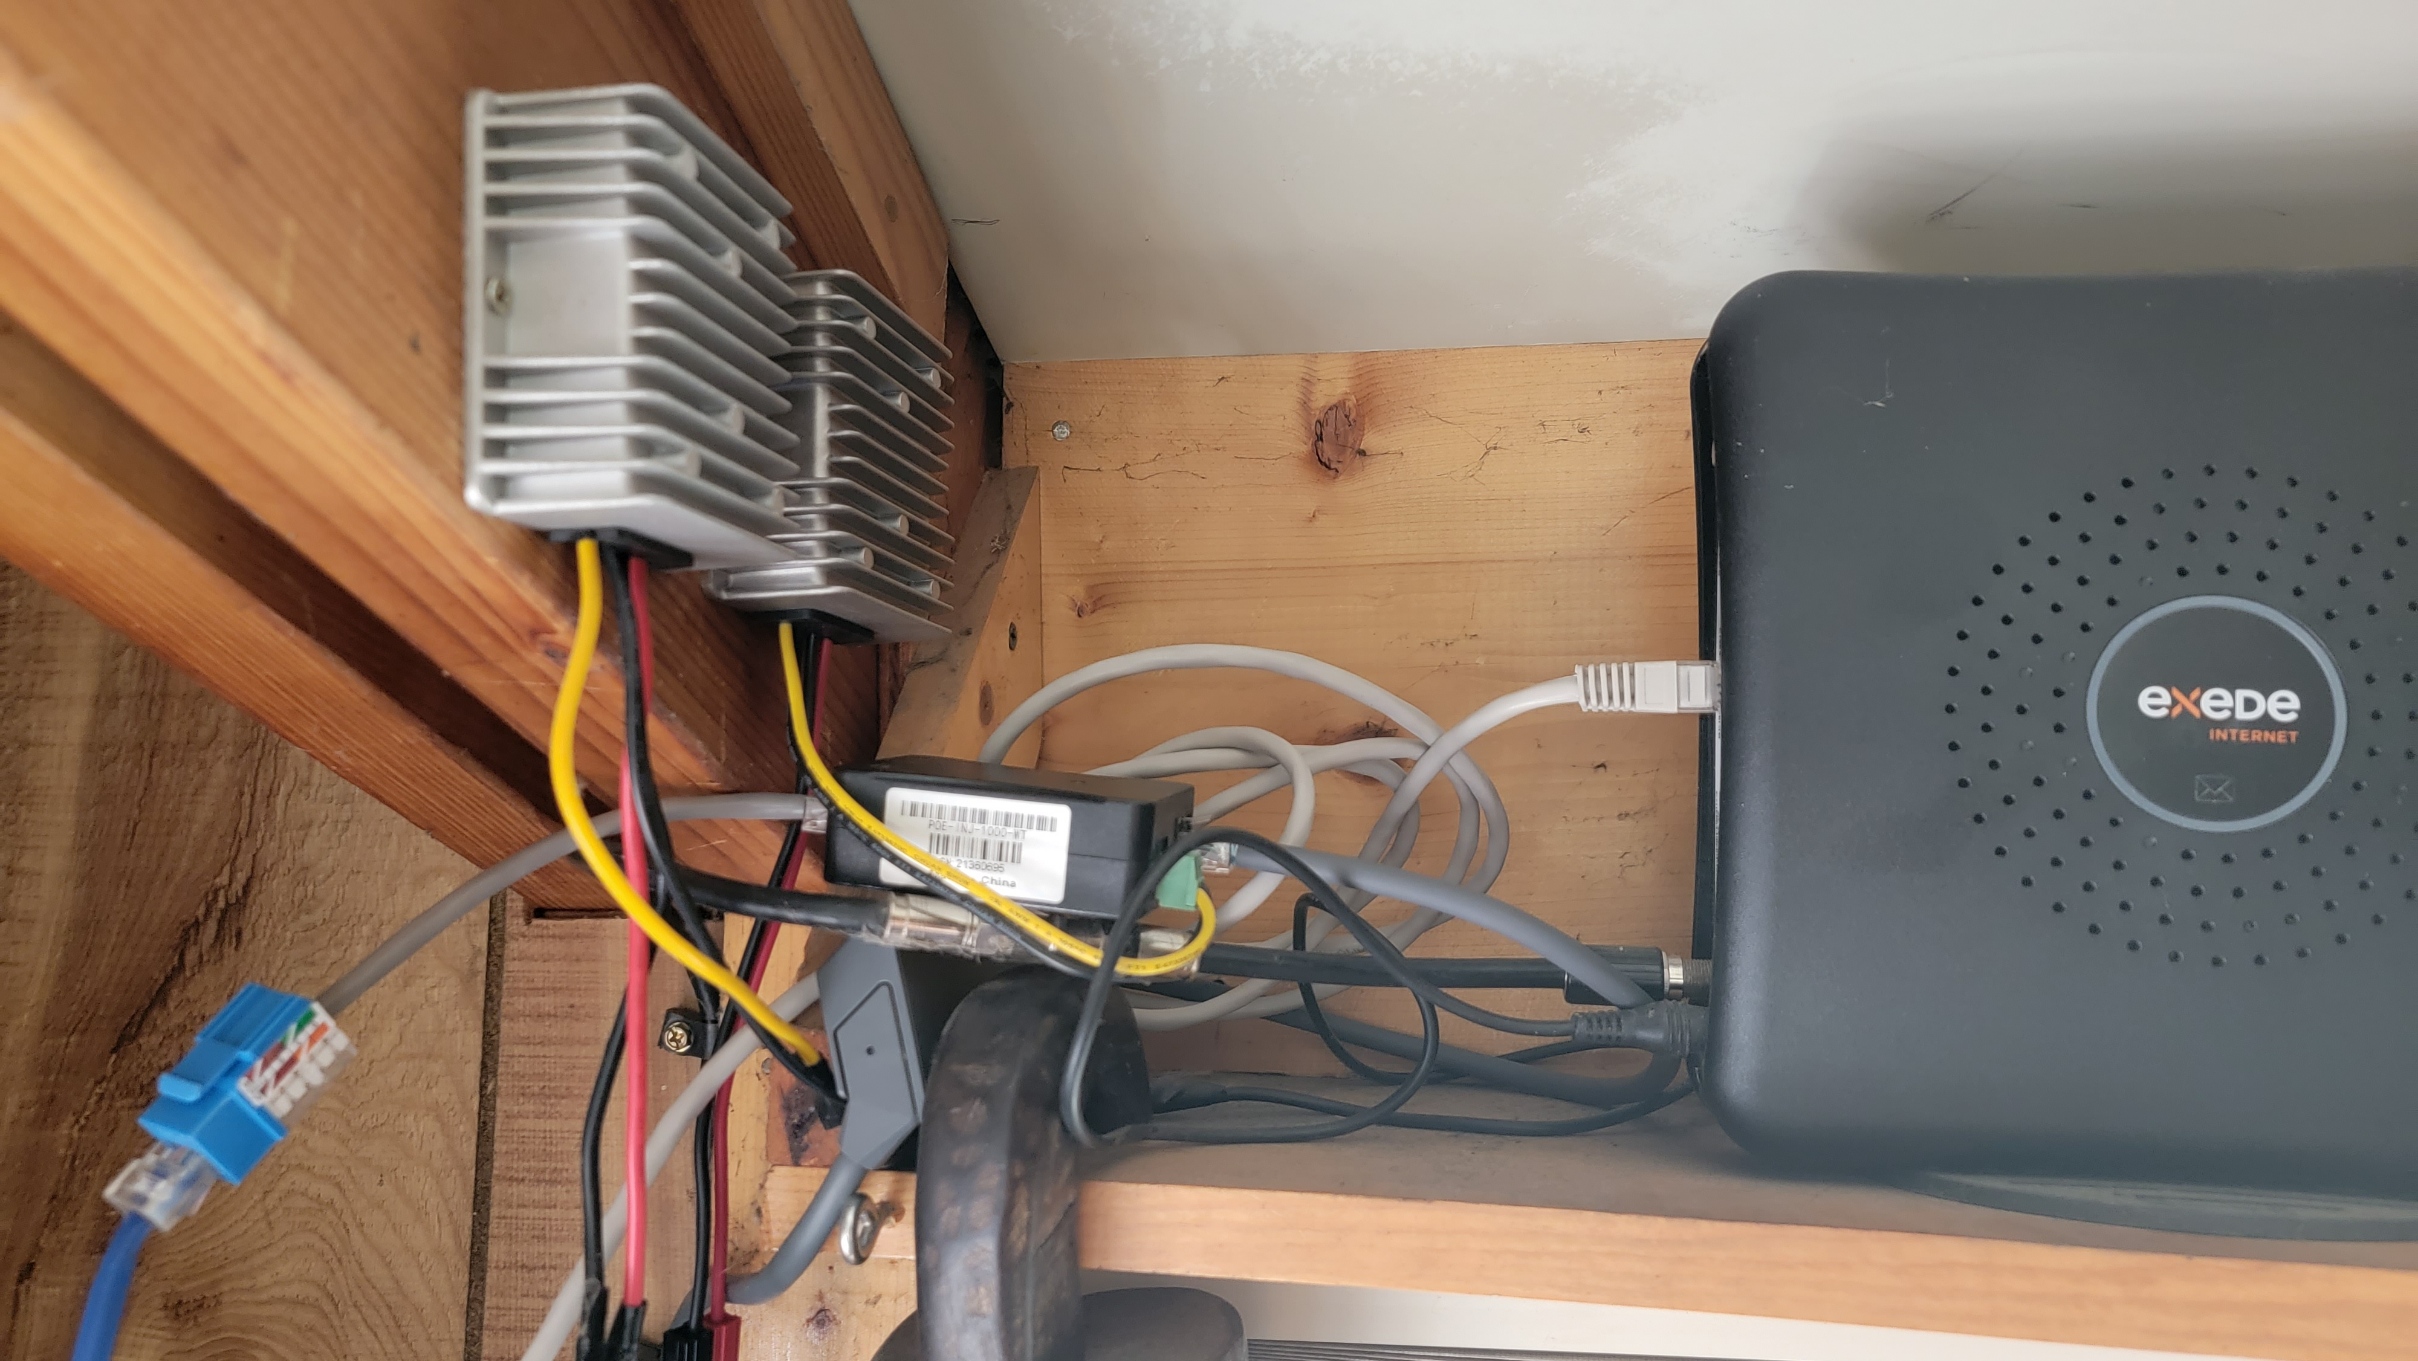
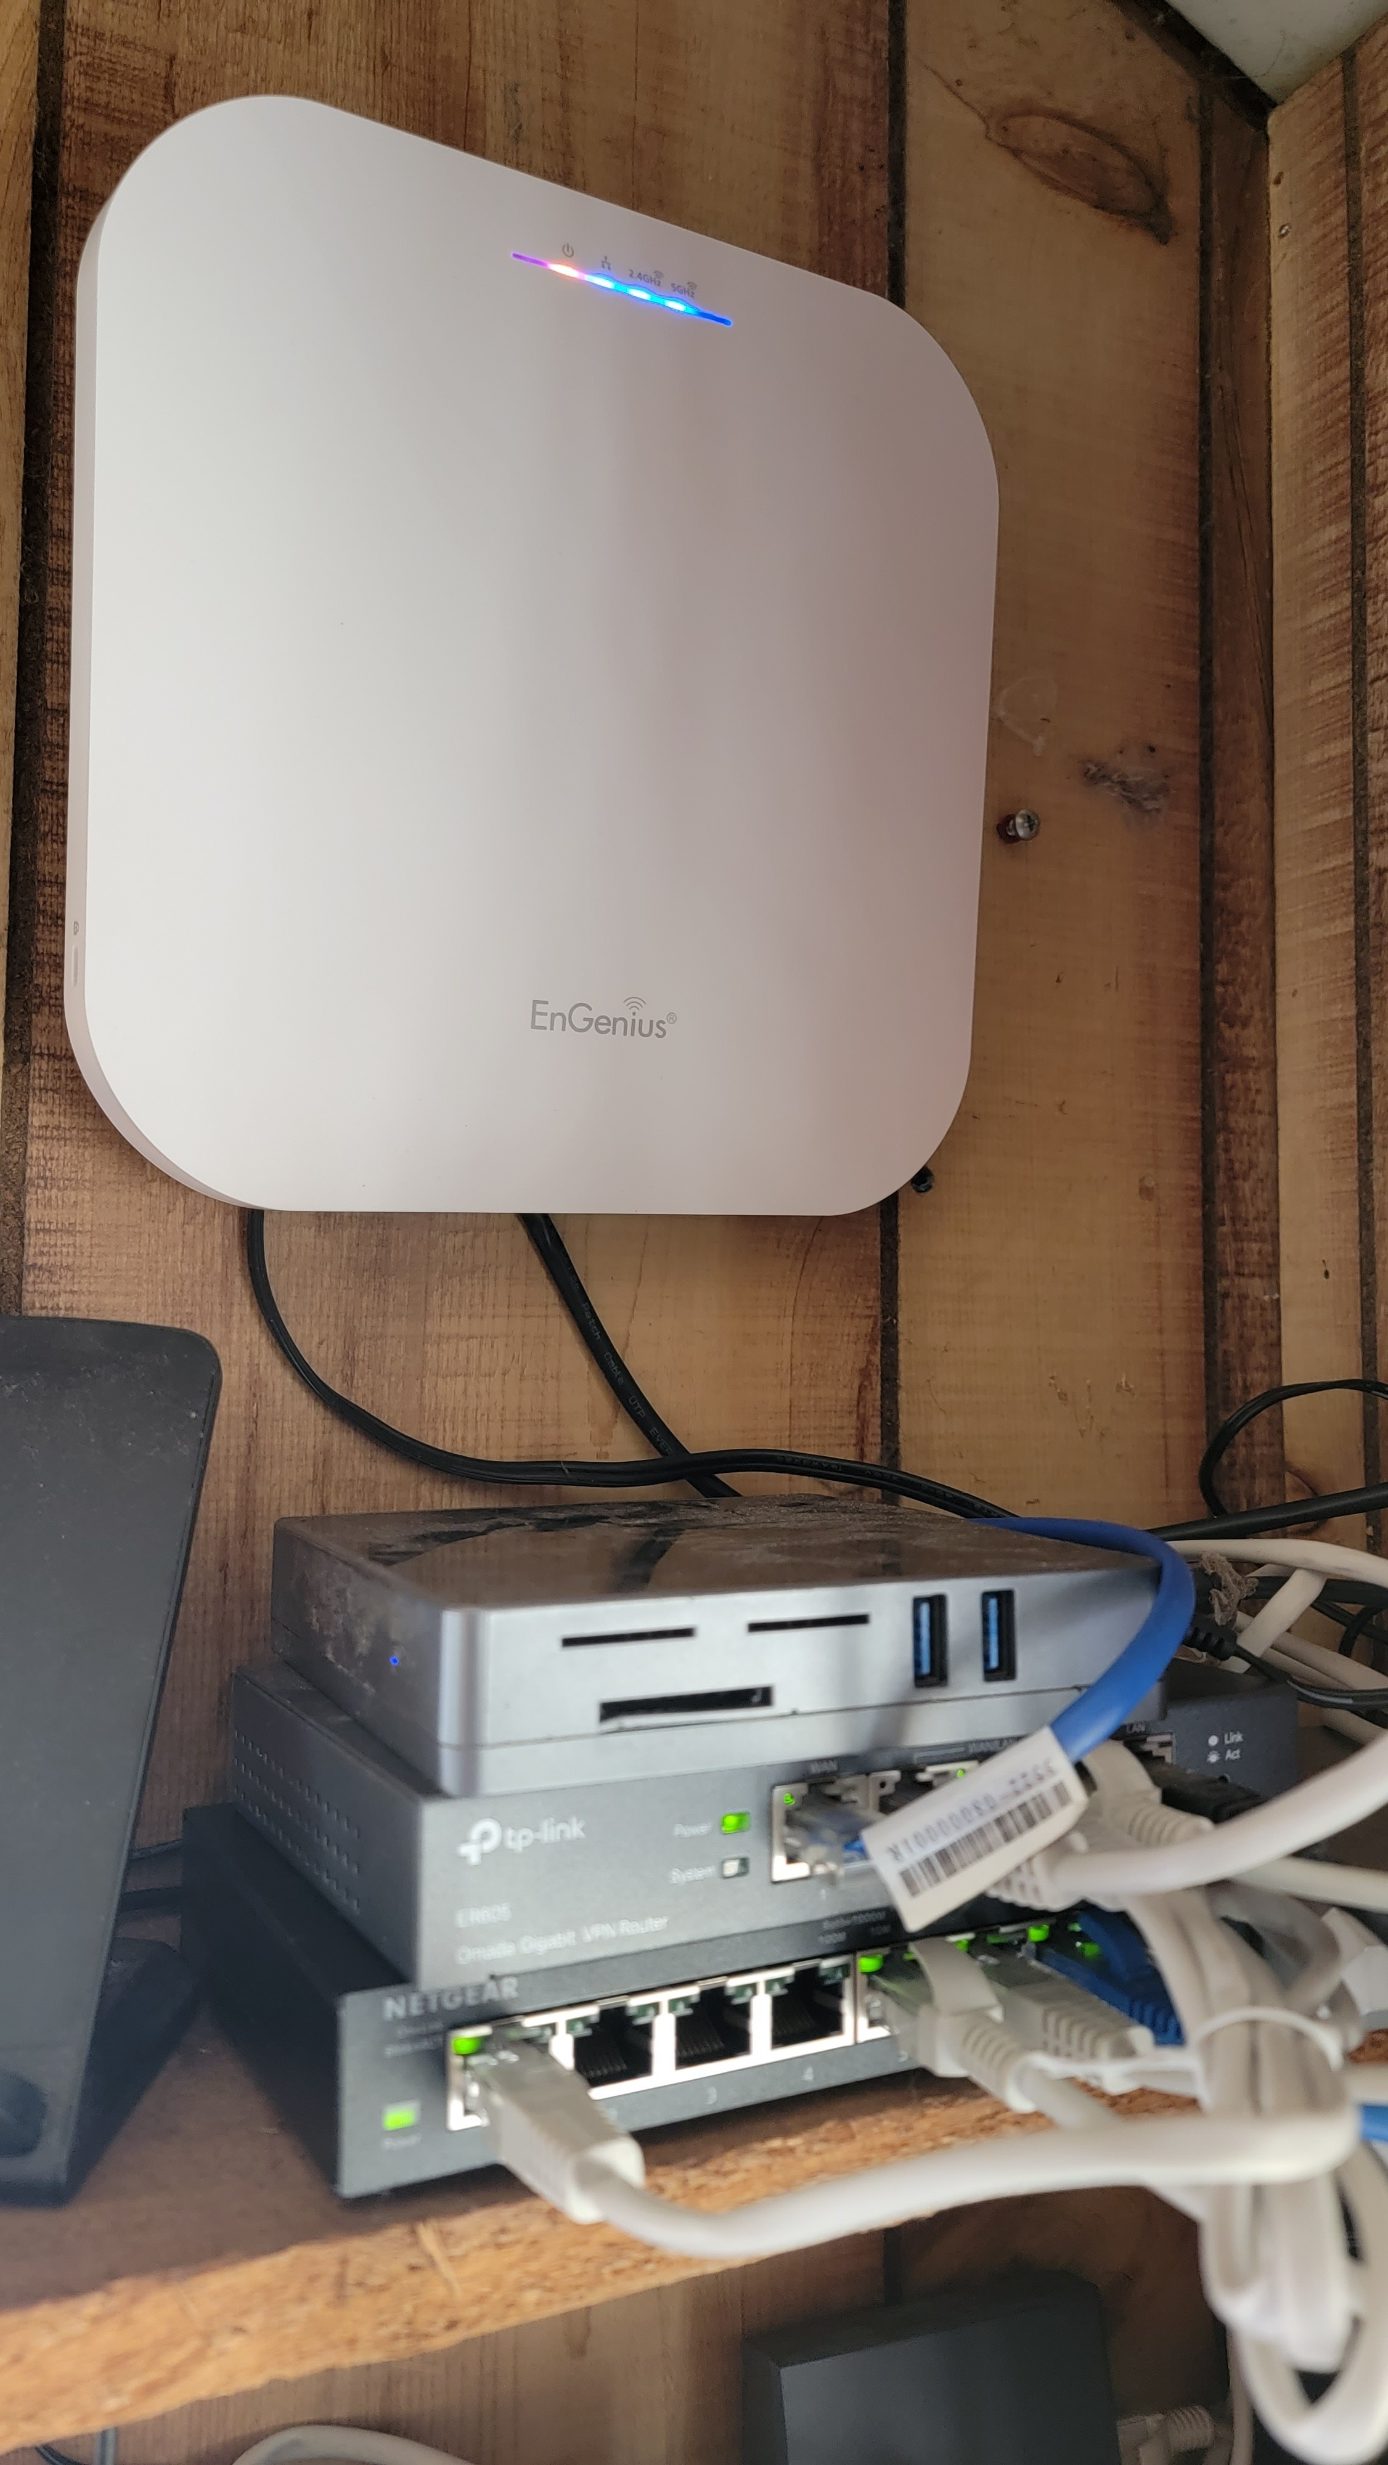
The DC connection to the poe injector with the modified Starlink ethernet adapter, and the multiport router, switch, and indoor access point
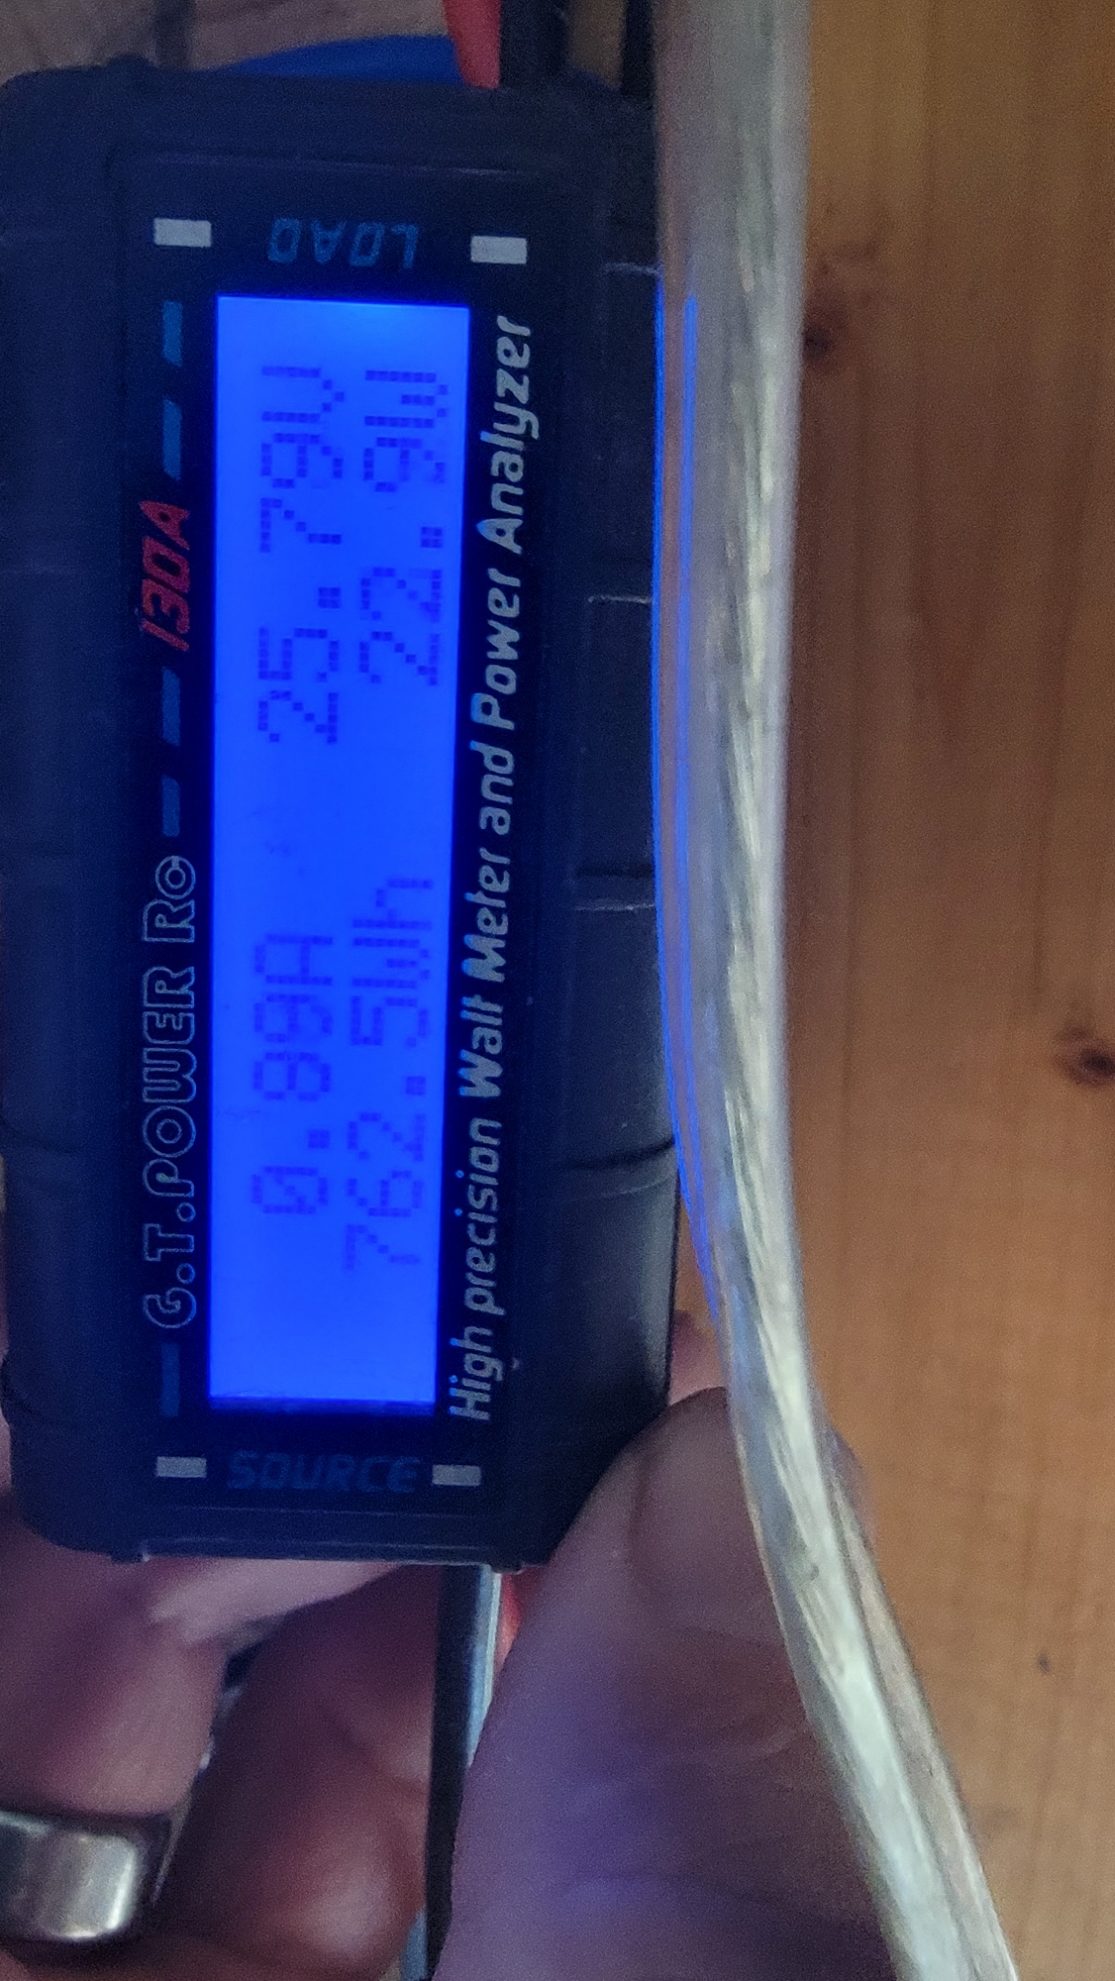
Pretty good speed, and not bad power usage on average!
And the Results are In
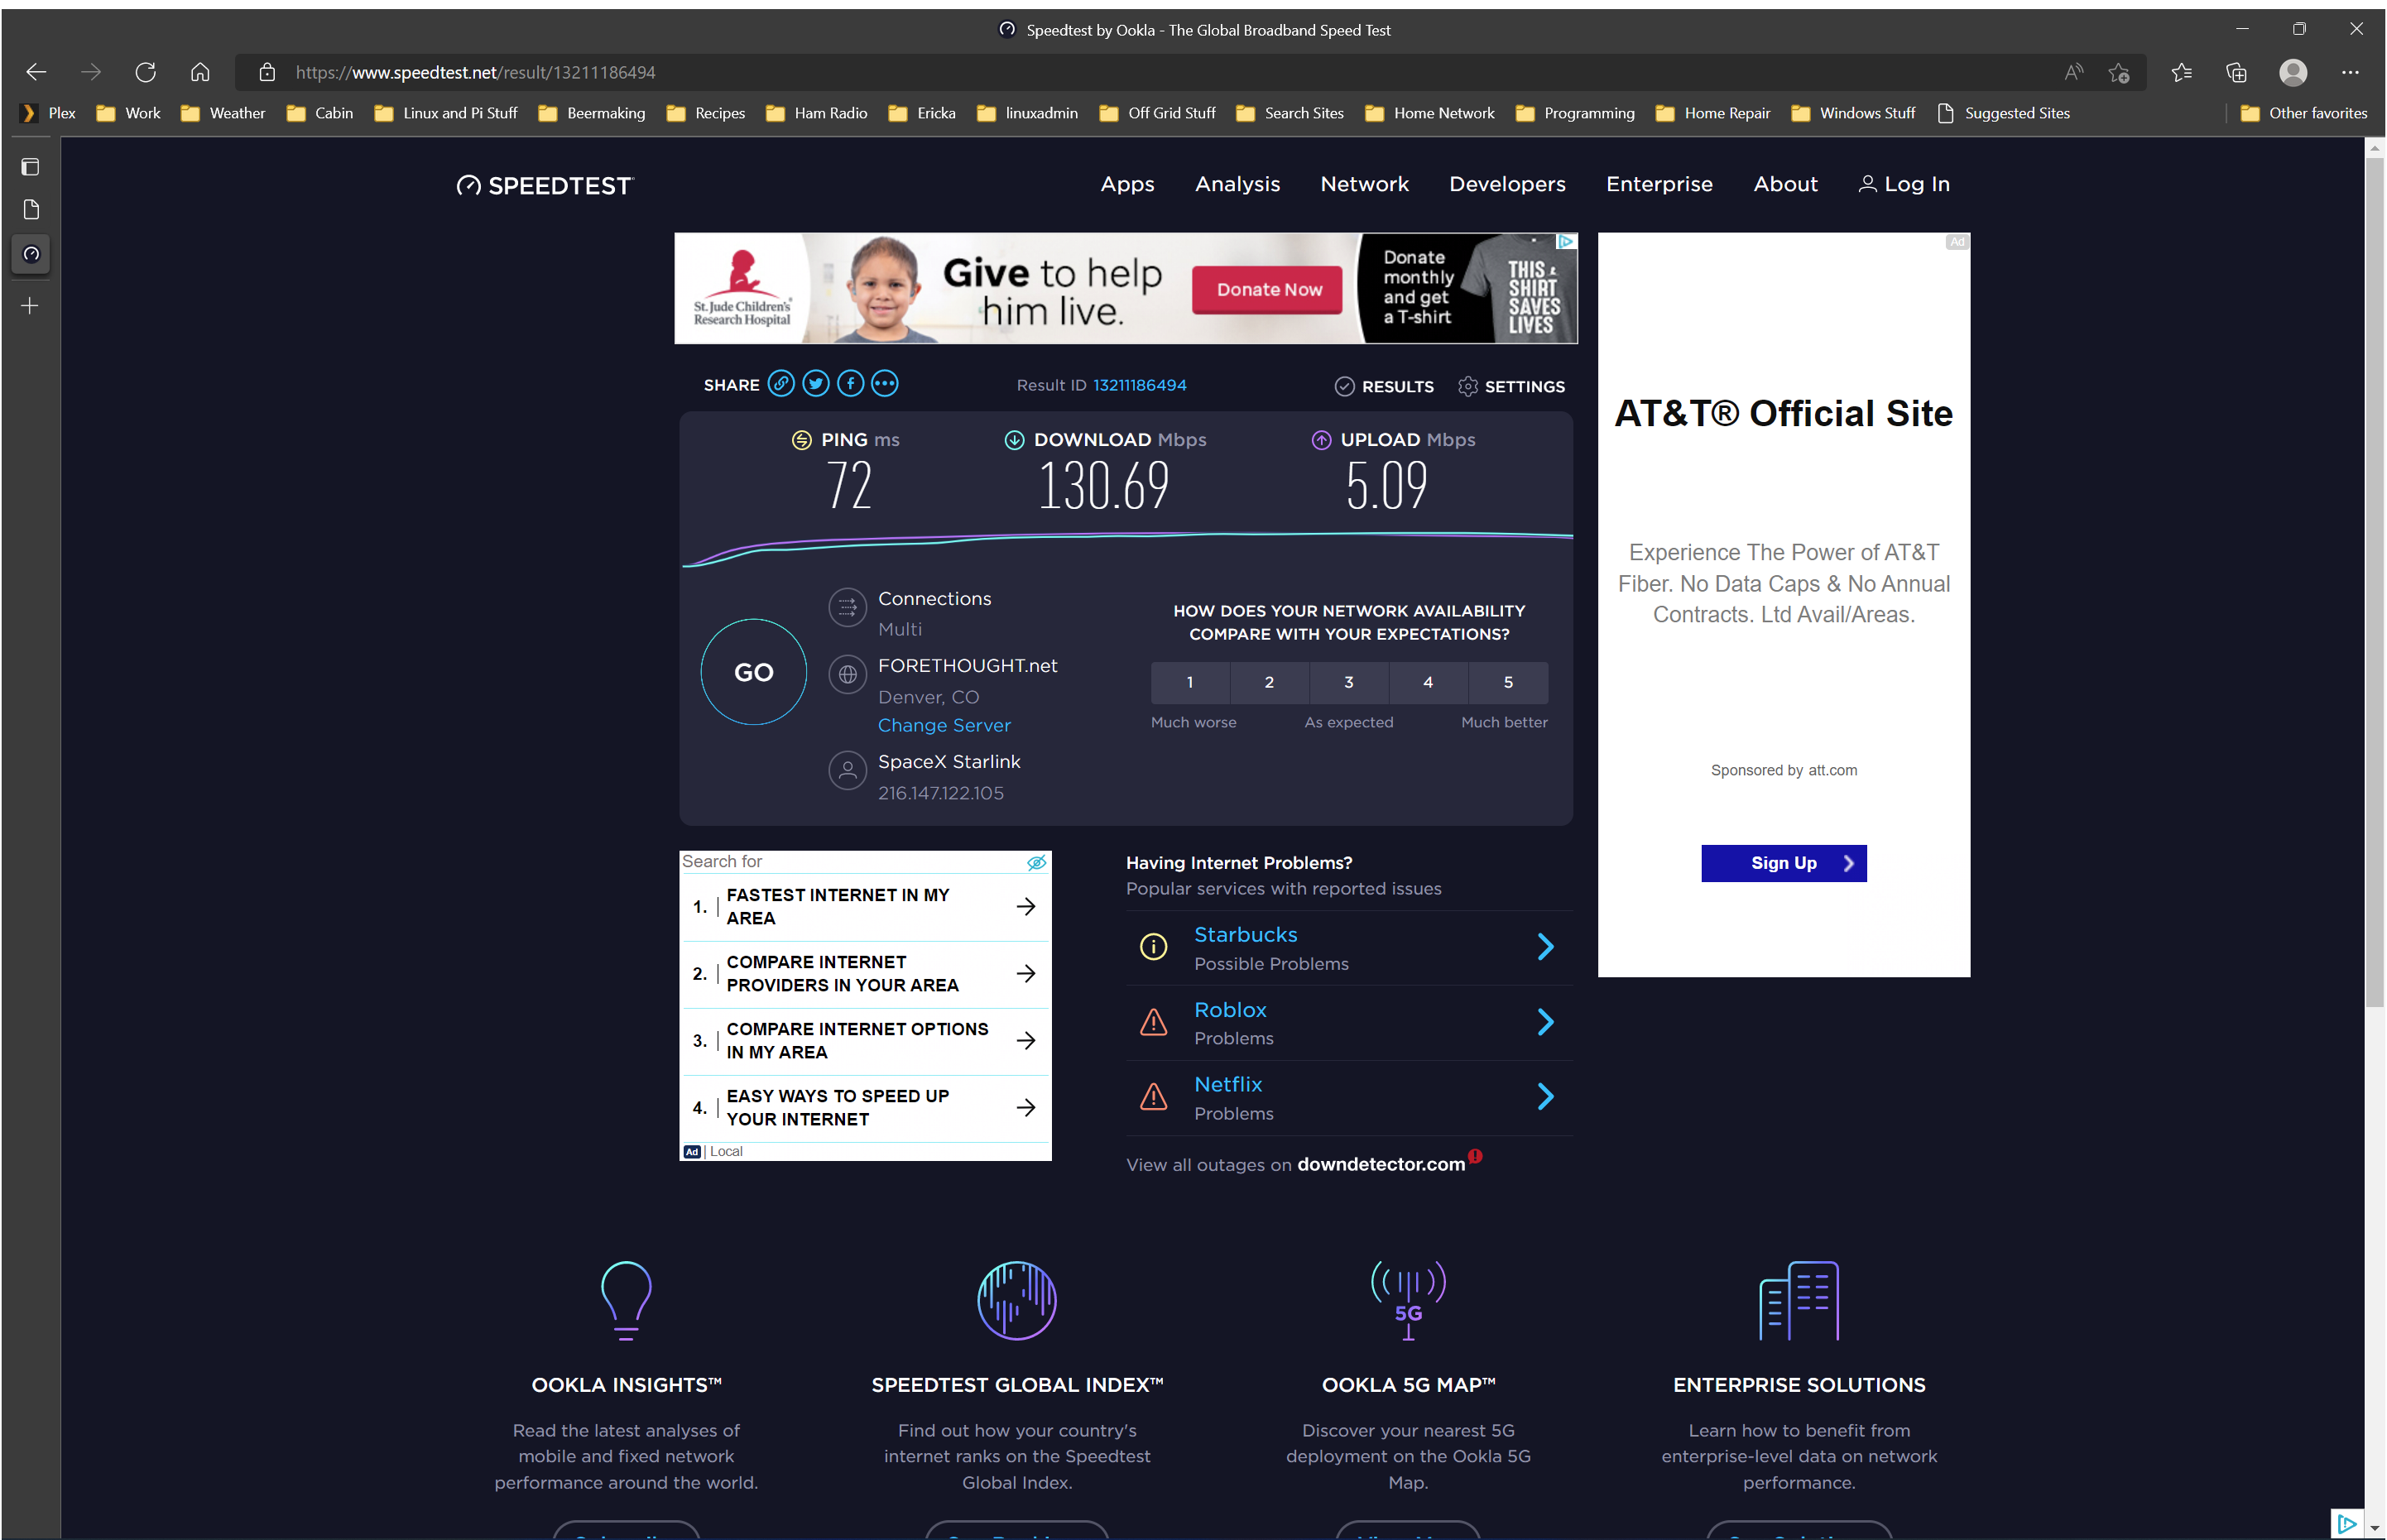
After I got it all hitched up and in place, speed tests were showing well over 100mbps on average, and around 5-10 upload. Very good considering that is higher internet speed than I have ever seen up here before! More importantly, with geo stationary satellites, ping times were around 600ms. I am consistently seeing sub 100ms and often around 40ms ping times which is a very large improvement. No more lag on the zoom calls, and we can watch a video without any buffering occuring at all.
What really surprised me though is that the average usage of power is actually pretty low. It seems to mostly sit between 20-30w of power, and spikes into the 40s on occasion. Viasat was consistently around 38w, so overall I am using less power which is always a good thing! I am really so far very impressed.
For the first time we sat down and streamed the new episodes of Stranger Things from Netflix without any buffering, delays, or concern of data use. The off grid cabin is now in the modern age!
Game Changing Technology
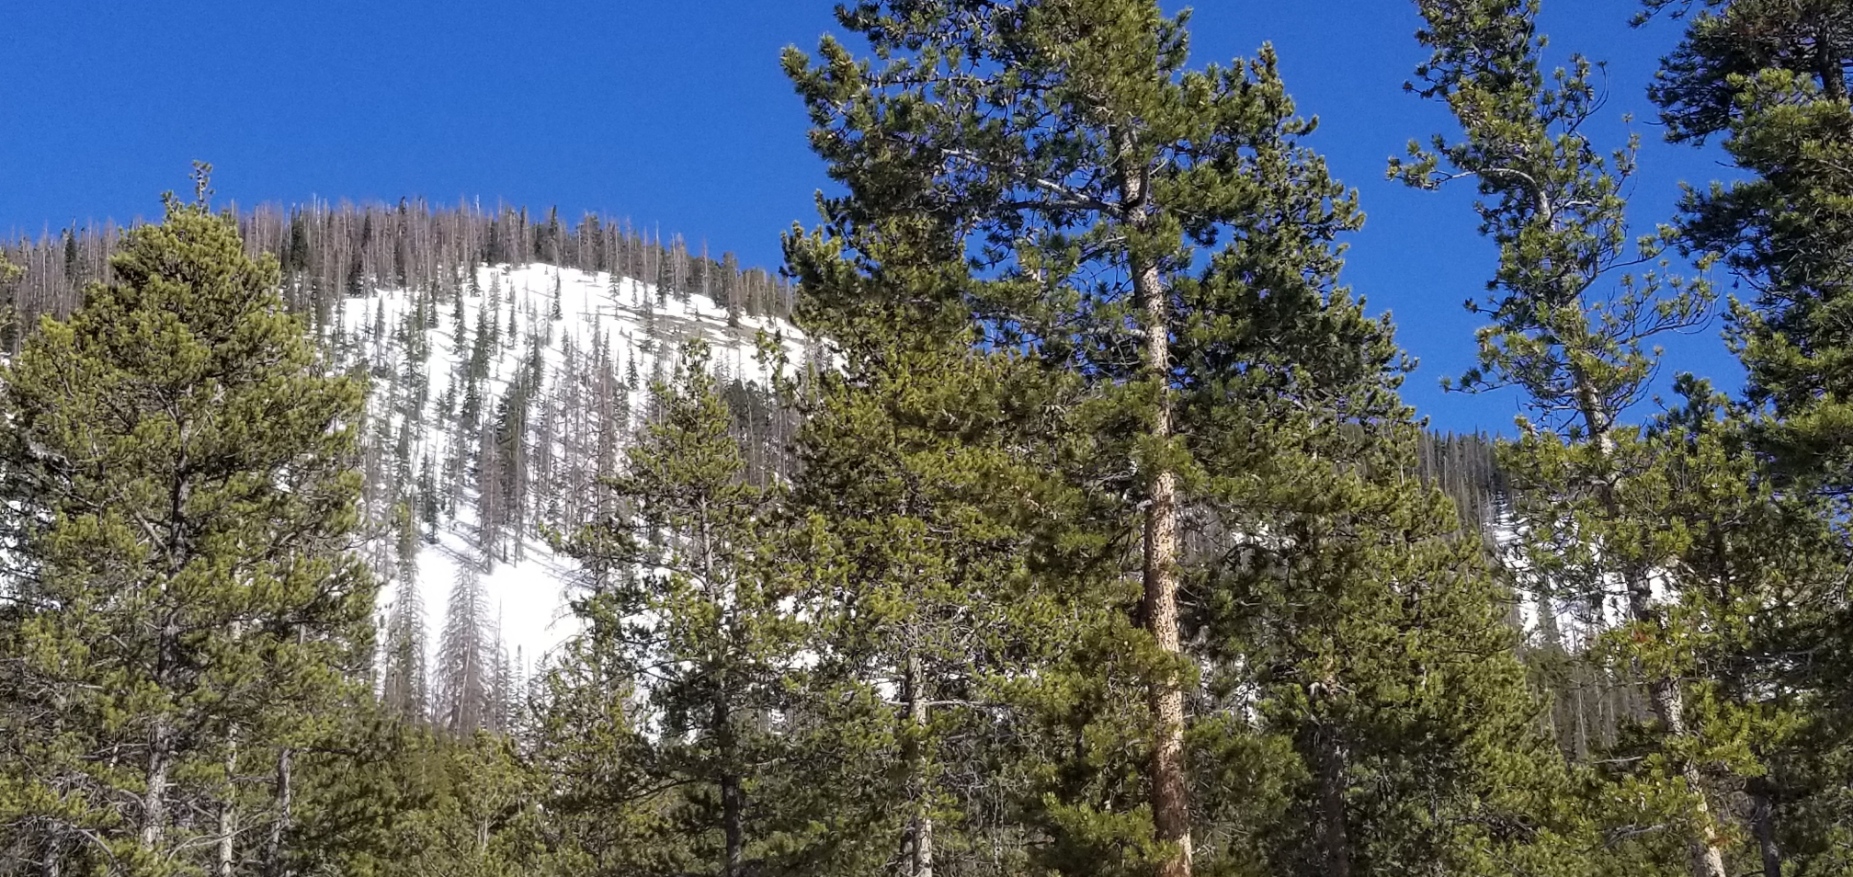
The only challenge is to make sure you have a clear view to the north. The dish will point itself once, and then scan the sky using its internal array, so open sky is the key. As you can see here I have some trees heading in its direction, but from the scan below you can see that it is not adding significant obstructions. So I believe this spot is going to work out great.
Overall, for the last three days, we have been impressed. The only glitch I found so far is we had a very heavy snowfall on the first night it was installed. I had not turned on the option for the heater to come on and melt off the snow. Well we lost internet and realized how hard it was snowing, and so I went to turn on the heater in the app…. But low and behold, you need the internet to change the options. Kind of a chicken and egg problem. After a manual cleaning and a quick app connection to turn on the heater before it snowed more on it, it then did just fine the rest of the night, but did at times draw up to 80w with the heater on.
Few things are this much of a game changer when you live life off grid. Internet was always a compromise, and this so far is delivering what we never had before. No longer do we have to make data choices about what we download and when. This really eases life up here living as an off grid CTO!
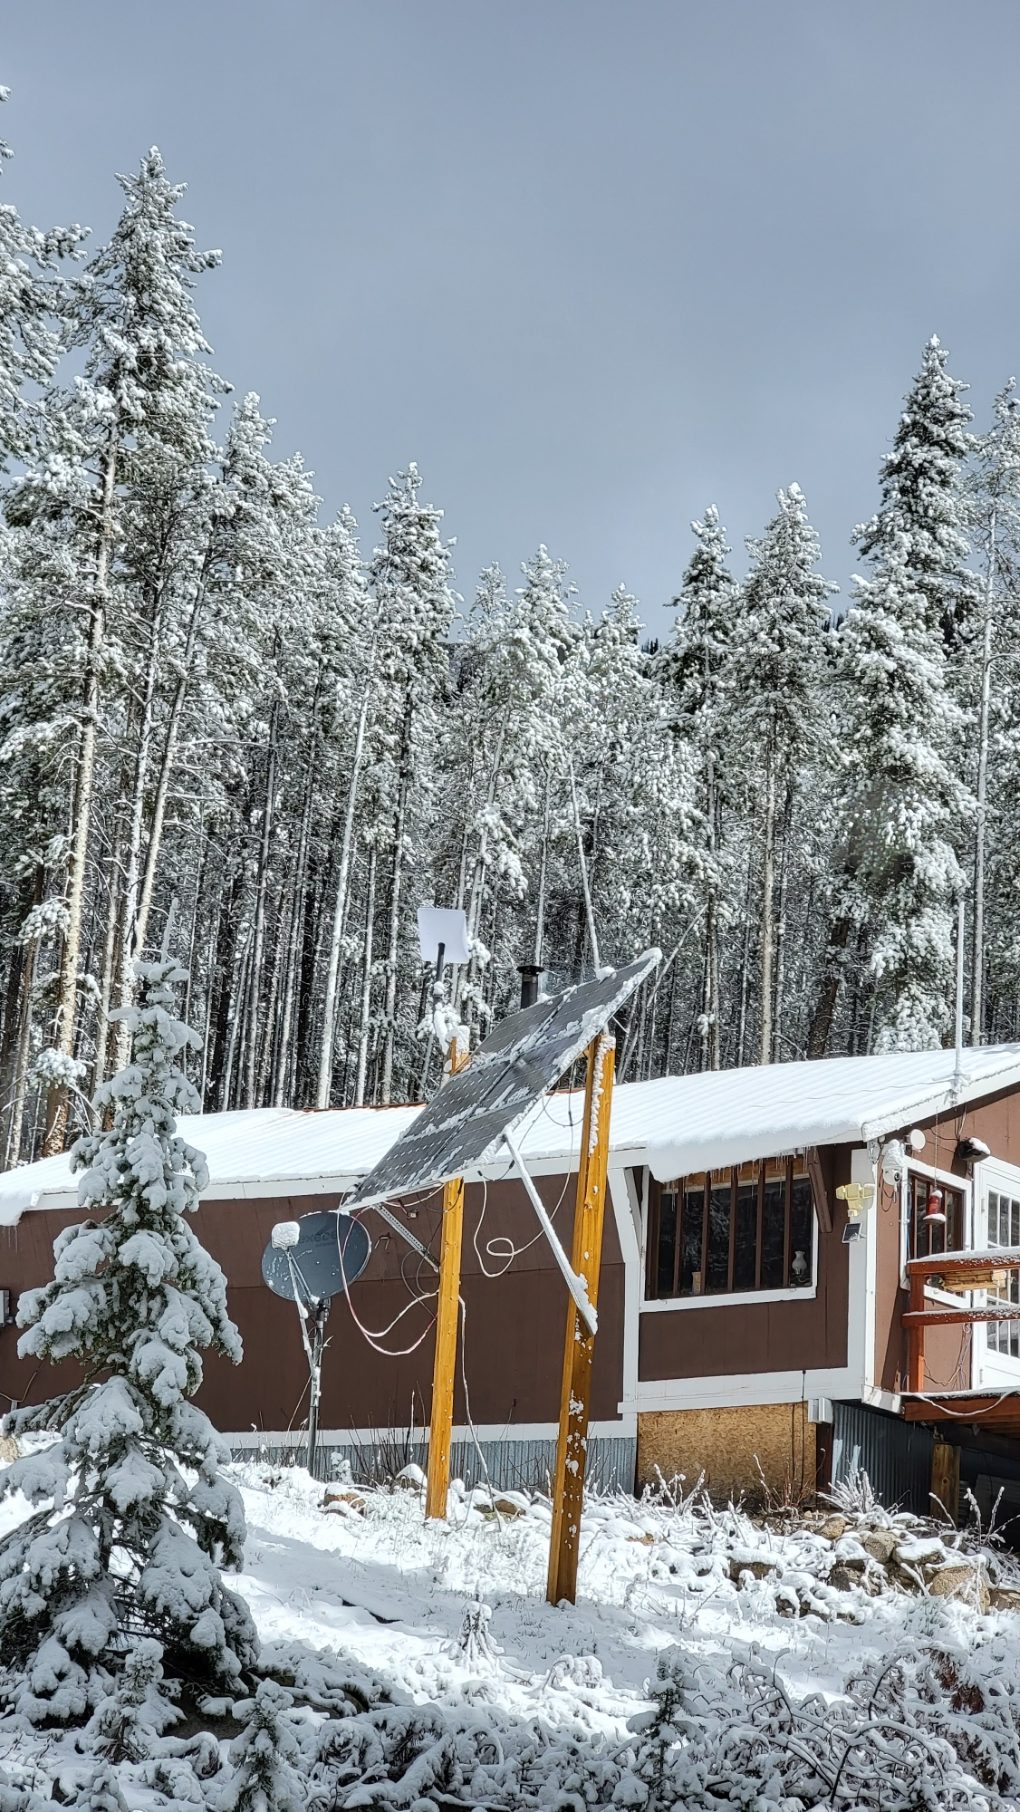
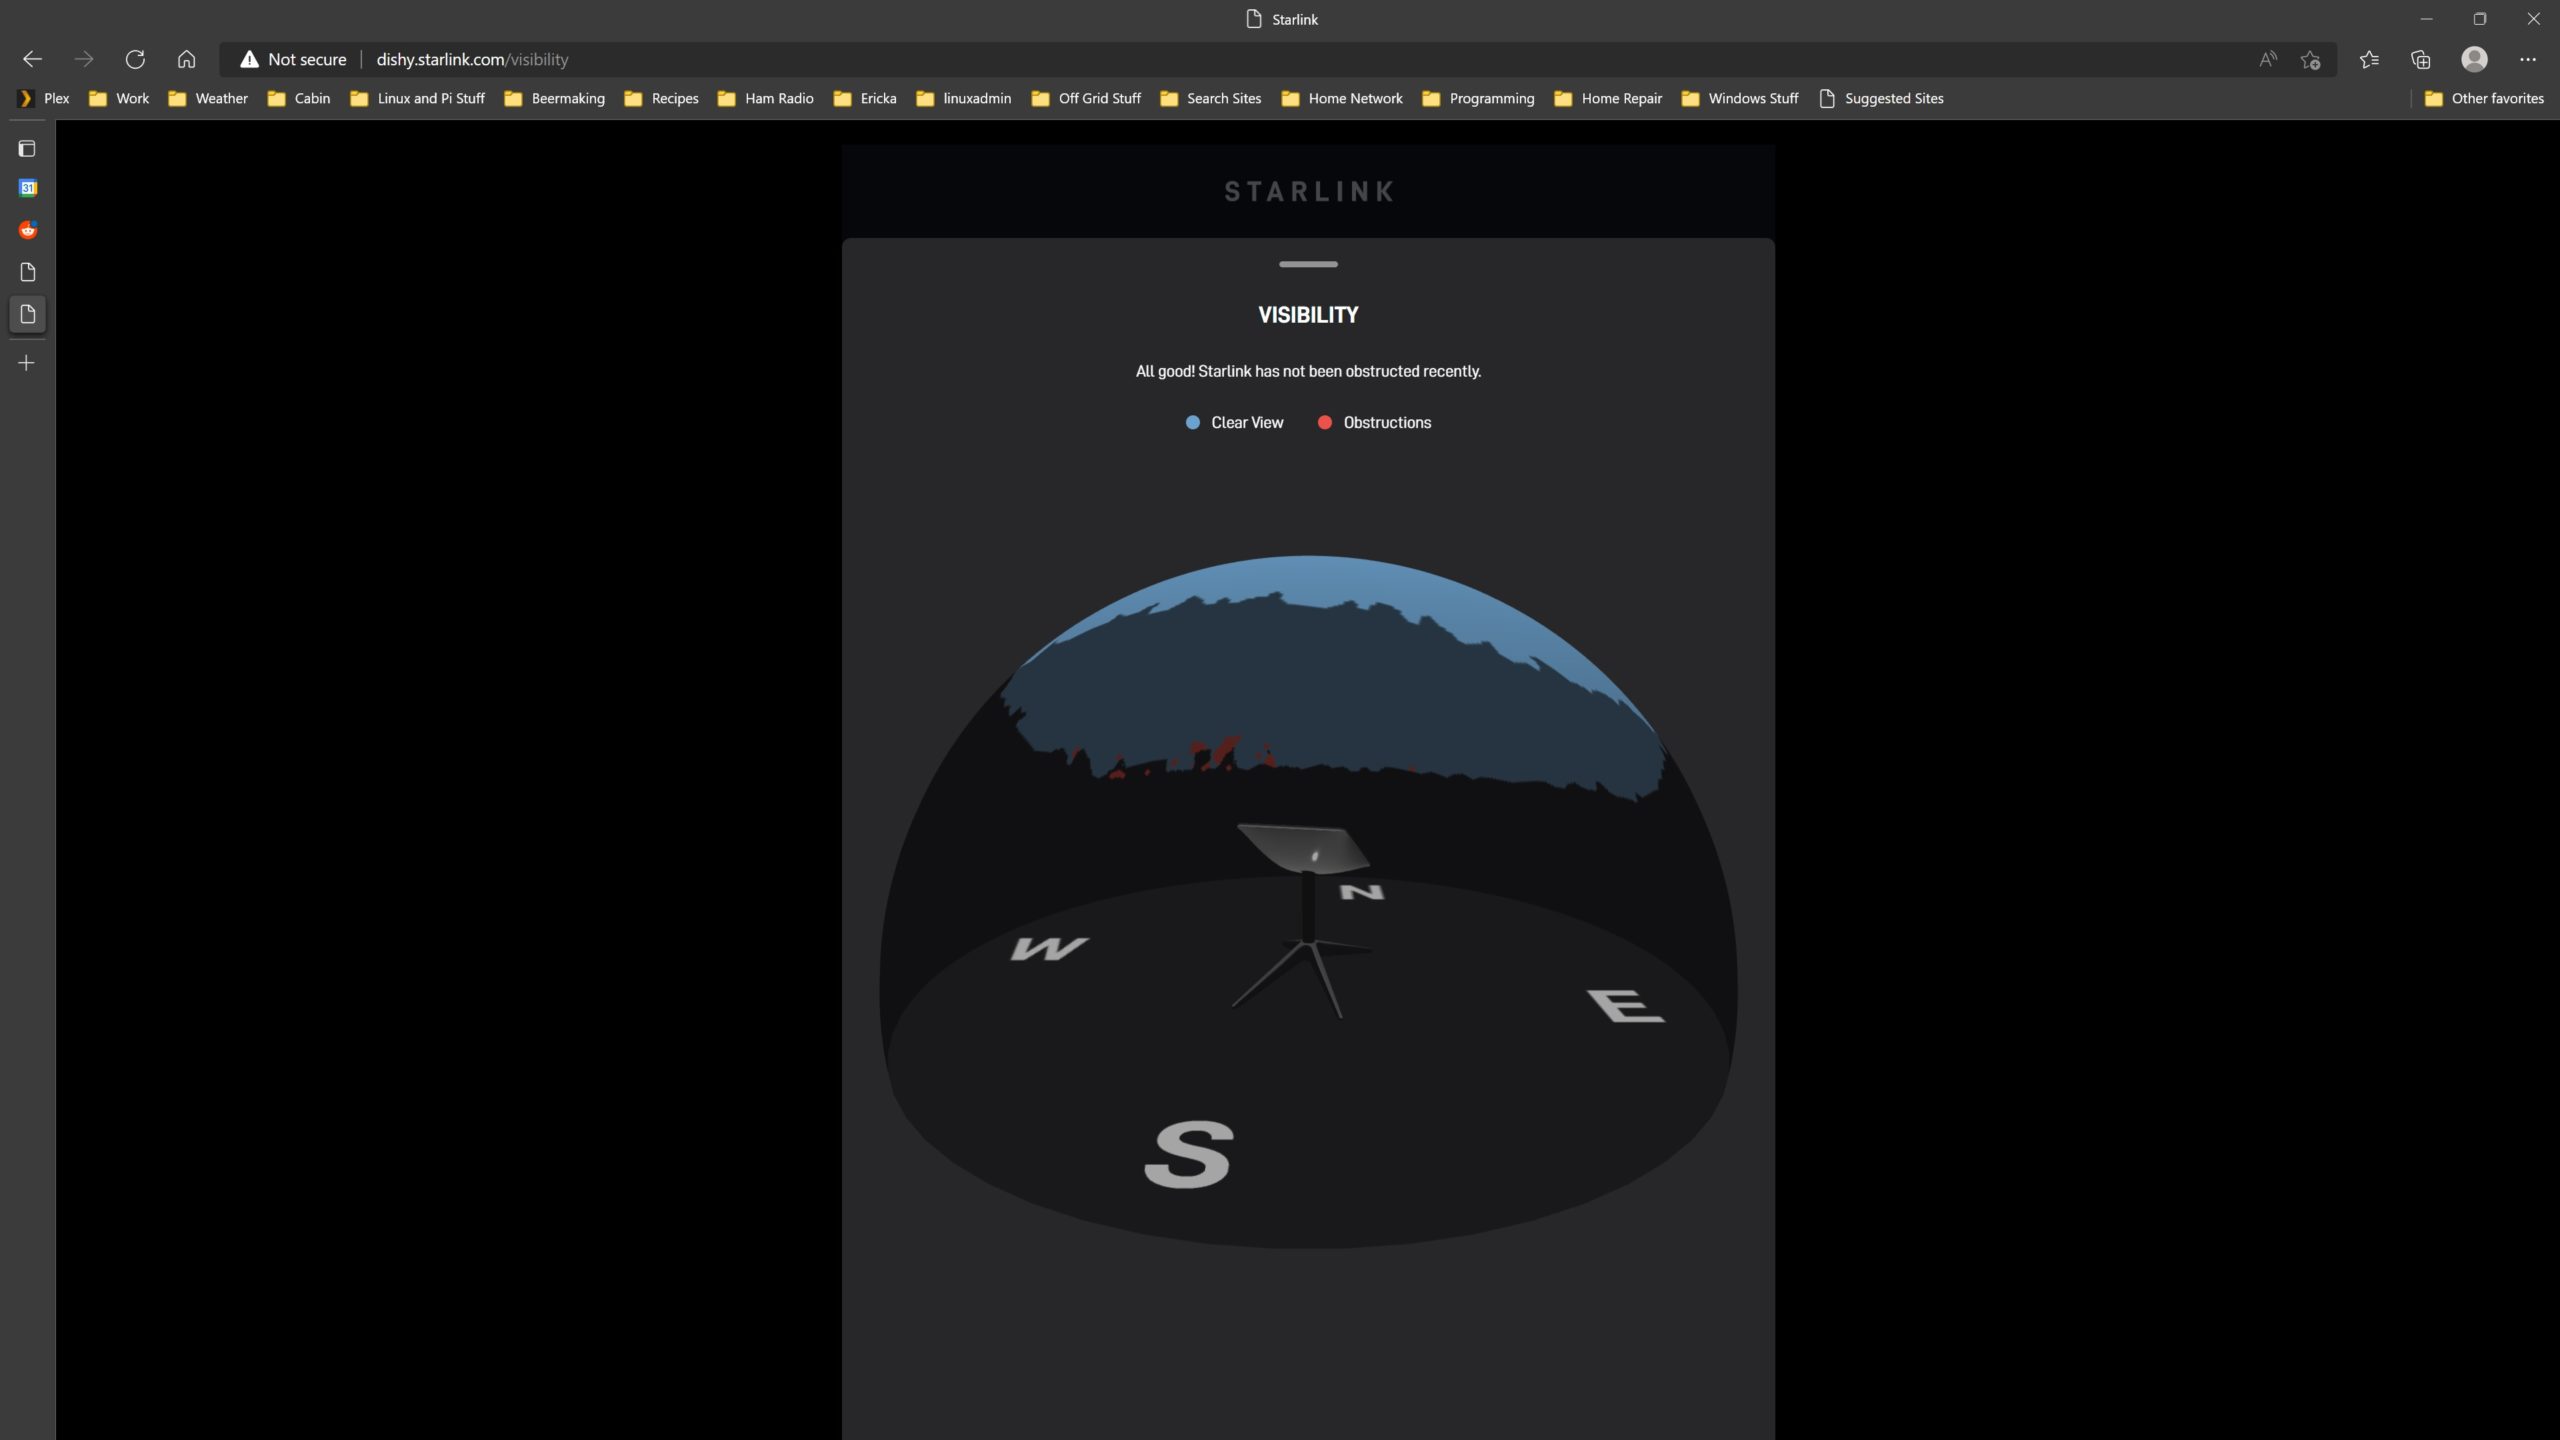
A clear view to the north is the most important thing, and from the scans so far it looks like I have a good spot!
Brilliant stuff.
Very impressive. Based on your surroundings, it seems like heaven with the internet!
Awesome content. Just what I need to get my caravan right out into the Australian bush and run the whole thing on 12v!
My next project has a parts list and a good set of instructions 🙂
Thank you for all this information.I have a remote off grid cabin in Southeast Alaska running on solar and just purchased a unit.
Questions:
1. When your not at your cabin in the snowy winter times do you take the dish down and store it inside? I`m sure you need some kind of power on to use the heater function? I turn everything off in the winter.
2.While mapping out the best place to install the dishy if I still have some trees/branches in the way will it still work but just not as well?
3.When running the cable out to the dish did you have to use some kind of conduit for year round snow protection?
Thank you very much!
If I were turning everything off, I would take it in just to avoid the snow load issues that could otherwise happen. That said, because I have it mounted on a pole, I don’t think it would likely cause a problem as snow would naturally fall off or blow off occasionally. My unit stays up 24×7 even if I am not there as I have security cameras and such setup. Mostly to look at the wildlife, though :-).
Depends on how big the branches are and how much green is on them. I had a few trees up front and it really didn’t cause much issue at all. After dropping them due to fire setback concerns, I did notice a slight improvement, though. Honestly, you just kind of have to try it to see how much it really is an issue.
For the cable you can see the picture of the grey electrical conduit. The dish end (not the bent end) fits through a 3/4 standard electrical conduit just fine. I ran that and buried it out to the dish. For the final bit going up to the dish, I let it be free and tied it to the pole, though, as I was not really concerned about the vertical portion.
Hope that helps!